Simple Ways to Save Time Using myLesley

It’s a busy and rapidly changing world. You need tools to help you keep the chaos under control and make sure you have time for the important things. Below are a few ways myLesley can help you simplify some of the course administration tasks, leaving you more time for teaching.
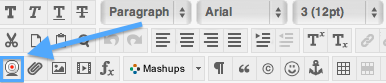
Send Email

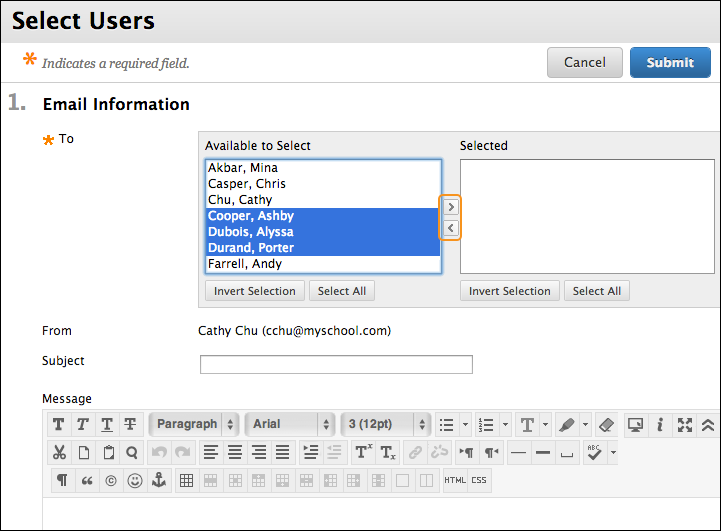
Looking up email addresses and setting up contact groups for your students can take a lot of time. Stop doing it! Email your students directly from your myLesley course using the Send Email tool. Email the entire class, groups of students, or select individual students. A copy of the message will be sent to your email address for future reference.

send email select users

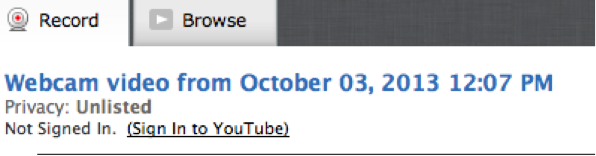
Are you better at speaking than typing? Try Voice Email instead. voice email icon

Many faculty find they can provide more information in the same amount of time by recording their message.

Announcements

The Announcements tool is a great way to share time sensitive information to the entire class.

announcement example

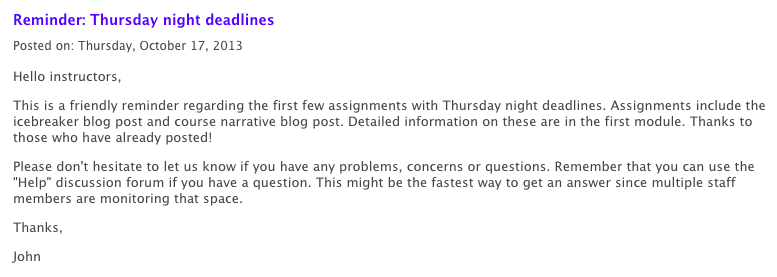
Use Announcements to kick off a new week, wrap up content and remind students about upcoming due dates. It’s a great way to summarize discussions and highlight key points for feedback to the whole class. Do you need to clarify information and clear up confusion that multiple students are having? Don’t send 15 emails. Send one announcement.

Announcements are visible on the home page of the myLesley course, but check ‘Send a copy of this announcement’ to also send an email to everyone. This will provide students two opportunities to receive important course information.

Create a Course Repository

Even if don’t teach online, having course content in myLesley can be incredibly helpful. Placing your syllabus, links to readings, and assignment information online allows students to easily find information when it’s needed, 24 hours a day/7 days a week. Clear organization and instructions translates to less frustration and confusion for students and fewer clarification emails for you.

Performance Dashboard

The Performance Dashboard provides a quick overall view of student activity in the course. The dashboard lists all the students and how long it has been since they last accessed the course. It is a quick way to identify students you may need to reach out to.

performance dashboard

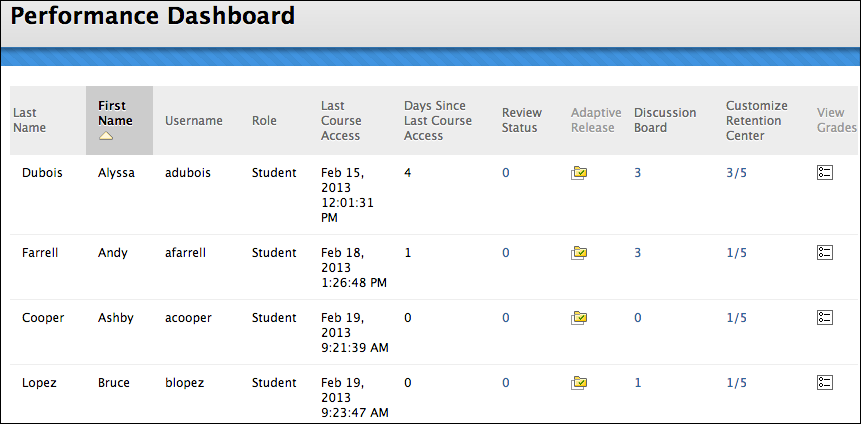
The dashboard also shows students’ discussion board activity. Click on the number in the ‘Discussion Board’ column to access details on an individual student’s posts.

These are just a few easy to apply tips for using myLesley as a time-saving tool. Check out our Faculty Instructional Technology Resources to learn more about myLesley’s features.

New Blackboard Feature – “Video Everywhere”

Now it’s easier than ever to put YOU in your course.

  • Want a quick and easy way to record and embed a short video introduction of yourself in your course?
  • Looking for a simple way to provide video feedback for your students?
  • Thinking about a way to record and post a short video demo?
  • Hoping to repurpose a video from your YouTube channel and add it right into your course in seconds?

You can do all of those things right in Blackboard with Video Everywhere!

VE RECORD IMAGE

Video Everywhere is a new feature in Blackboard that lets you record with your computer’s webcam, upload the video right to your YouTube account, and embed it into your course – all at the same time and all without leaving the Blackboard environment. If you already have a video in your YouTube channel that you’d like to quickly insert in your course, you can use Video Everywhere for that too!

Got a computer, a webcam, a Google account, and a YouTube Channel? You’re good to go!

Getting Started
When you choose to add an item to your course, you’ll find the “Video Everywhere” icon in the Content Editor. It looks like a small webcam:

 video_everywhere_icon

You can find the icon located in the lower left-hand corner of the content editor:

VE_Location

When the “Record” window opens, just sign into your Google/YouTube account (you’ll need to create a Google account if you don’t have one already and you’ll need a YouTube channel if you don’t have one yet.).

step3

Note that the default is the Record screen but you can choose the Browse tab to insert a video you already have in your YouTube channel.

Once you sign in, you’ll be walked through the process to easily Record, Upload and Insert your video right into your course. Just grant access when asked along the way.

Once it’s in your YouTube channel, the video will be available to insert in any of your other courses using Video Everywhere’s Browse option from within each course.

That’s all there is to it!

A word about privacy: Please be aware that any video recorded with Video Everywhere will go directly to your YouTube account and have a default privacy status of “unlisted”. This means that it can only be viewed by those who have the URL for the video, and it won’t come up in a search, but the status is NOT “private”.  More information about this is available on Blackboard’s Video Everywhere Support site (see link below).

For More Information
You can find a step-by-step guide to using Video Everywhere here: Blackboard’s Video Everywhere Support Page, including information about privacy issues and making videos accessible.

You can also view Blackboard’s quick video introduction.

For more help with this new feature, contact elis@lesley.edu.

myLesley Update for Spring 2014

Happy New Year and welcome back from the break. We are excited to announce that as of January 3rd, 2014, myLesley will be updated to include a couple of enhancements: the profile feature and a new “look and feel,” which will enable viewing the discussion board in tree view again. You will find detailed information about these enhancements below.

New Profiles
You can now create a profile in myLesley to share with your classmates and instructors. Your profile will allow you to post a photo of yourself, and provide a little information about yourself, such as what you are studying. Profile photos can be viewed next to your posts on the discussion board, allowing you to better connect with your classmates and colleagues. You also will be allowed to choose how you want your name to display in your profile.

profile_update

Learn how to create your profile at http://tinyurl.com/qjxhdjm.

Return of the Discussion Board Tree View
If you have missed the Tree View on the Discussion Board, the new “look and feel” of Blackboard allows us to get that back. You can once again choose to view discussion forums in list or tree view depending on your preference.

tree_view

New Icons
The new “look and feel” of myLesley also includes a few new icons:

icon1  The new Logout button looks like a power icon seen on many digital devices.

icon2  View and edit your Profile.

icon3

 Posts from multiple courses.

icon4  View the Calendar.

When editing content, the chevron menu icon chevron  no longer exists. In the new, cleaner look, you will not see edit icons until you hover your mouse over the item of content you wish to edit. Once you move your cursor to the item you would like to edit, all the edit options will appear. The old chevron edit icon has been replaced with a simple down arrow.

chevron_ex

Please remember that if you hover your mouse over any icon you don’t recognize, a text popup will identify it for you.

pop_up_note

For more information on how to use myLesley, please refer to our Faculty Instructional Resources site.

How to Make Printable Versions of Your Weekly Sessions in Blackboard

It is possible to make printable versions of your weekly sessions or modules for your students in Blackboard whether or not your materials are organized in folders or in learning modules.

chromeTo begin, you’ll need to log into your course using the Chrome browser. If you don’t already have Chrome installed on your computer you can download it here. Please note that Firefox is still the browser we recommend that you use for Blackboard activities but the Chrome browser appears to be the only program that allows us to create printable copies of Blackboard screens.

1. Once you’ve logged into your course via the Chrome browser make sure the Edit button is toggled to the “On” position.

2. On your sidebar locate the menu item where your course materials are housed. For example, you may have an item titled “Course Modules or Course Sessions.” Right click on this link. A menu will open. Select the “Open in New Tab” option.

open_new_tab

3. At the top of your browser you’ll now see 2 separate tabs. Click on the item that is labeled with the same title as the menu item that houses your course materials. In this instance we’ll click on the tab called “Course Sessions.”

session_tab
4. On the screen you’ll now see a list of the sessions or modules that appear in your course. Right click on the week you would like to make a printable for and once again click on the “Open in New Tab” option from the menu that appears.

item4print
5.  At the top of your browser you’ll now see 3 separate tabs. Click on the item that is labeled with the same title as the session or module that you’d like to create a printable version. In this instance we’ll click on the tab called “Week One: Getting Your….”

item5print
6. You’ll now see all of the content items for the week you selected in your browser window. At this point we recommend that you minimize any sidebar menus (located on the left hand side of the page) that appear in your course.

If you’re using Learning Modules with a Table of Contents you can minimize the table by clicking on the icon indicated below:

toc
To minimize your main course menu (or sidebar) click on the arrow icon.

minimize

7. Now, at the top of your screen, locate the menu item called “File.” Click on this item. A menu will open. Select the “Print” option from the menu.

step7

8. In the print menu window click on the “Change” button located in the Destination area.

step8
9. In the new window that appears, locate the Local Destination section and click on the “Save as PDF” option.

step9

10. A new menu will appear. A preview of your course session will be located on the right hand side of the page. Click on the Save button found on the upper left hand side of the window.

step10

11. The Save As window will open. Here you can rename the file and select the location on your computer that you would like to house the document you’ve created. When you’ve made your edits and/or selections click the “Save” button.

step11
 12. Now you can upload this printable version of your content to the class or email it directly to students. Please contact elis@lesley.edu if you need additional assistance. You can also print these instructions.

The Journey to Expert Performance: Authentic eLearning Assignments

How can we best support learners in their ability to apply knowledge and skills to complex situations? Moving away from abstract, decontextualized learning that leads to inert knowledge is difficult to transfer to problem-solving situations. A key element that can move learners to a higher level of expertise is a cognitively authentic task. Collaboratively working on complex, authentic tasks can be a key to students’ successful transfer of knowledge and skills to real world contexts.

Cognitive Apprenticeship

In the late 1980s and early 1990s, Collins, Brown and Newman (1989) suggested an extension of the traditional apprenticeship model of learning through what they termed the “Cognitive Apprenticeship”. They claimed that traditional apprenticeships have three elements cognitively important for a model of learning:

  1. Leaners have access to models of expertise-in-use against which to refine their understanding of complex skills.
  2. Apprentices often have several masters and have access to a variety of models of expertise leading to an understanding that there may be different ways to carry out a task, and that no one individual embodies all knowledge and expertise.
  3. Learners have the opportunity to observe other learners with varying degrees of skill (p.456)

Authentic e-Learning

authentic task visual

More recently, Herrington, Reeves, and Oliver (2010) have developed a framework based on the idea of cognitive apprenticeship. The elements of the framework can be used as a set of criteria for designing learning experiences:

  1. Provide authentic contexts that reflect the way the knowledge will be used in real life
  2. Provide authentic tasks
  3. Provide access to expert performances and the modeling of processes
  4. Provide multiple roles and perspectives
  5. Support collaborative construction of knowledge
  6. Promote reflection to enable abstractions to be formed
  7. Promote articulation to enable tacit knowledge to be made explicit
  8. Provide coaching and scaffolding by the teacher at critical times
  9. Provide for authentic assessment of learning within the tasks

Authentic learning is very well suited to online learning, but while students may be familiar with technologies of participatory culture, they need guidance in working on collaborative online teams and coaching at critical times during problem-solving.

If you are interested in creating an authentic online or blended task for your online, hybrid or face-to-face teaching, please feel free to contact elis@lesley.edu. Our design staff has expertise in the creation of collaborative online learning and have presented at national conferences on the topic.